How To Use A Check Engine Light Scanner?
When your check engine light comes on, it can be a source of stress and uncertainty. But did you know that you can use a check engine light scanner to help diagnose the issue? This simple tool allows you to connect to your vehicle’s onboard computer system and retrieve error codes that can give you valuable information about what may be causing the check engine light to illuminate. By understanding how to use a check engine light scanner, you can have peace of mind and save yourself from expensive trips to the mechanic.
A check engine light scanner is a must-have tool for any car owner or automotive professional. With the ability to read and clear error codes stored in your vehicle’s computer system, you can quickly identify the root cause of a check engine light. Not only does this save you time and money, but it also empowers you to take control of your vehicle’s maintenance and repairs. By resolving issues promptly, you can avoid more significant problems down the line and ensure your vehicle is operating at its best. Whether you’re a DIY enthusiast or a professional mechanic, a check engine light scanner is an essential tool in your arsenal.
To use a check engine light scanner, follow these steps:
- Locate the OBD-II port under the dashboard of your vehicle.
- Plug the scanner into the OBD-II port.
- Turn the ignition key to the “ON” position, but do not start the engine.
- Follow the instructions provided by the scanner’s manufacturer to initiate the diagnostic process.
- Wait for the scanner to retrieve the trouble codes from the engine control unit (ECU).
- Review the trouble codes displayed on the scanner’s screen.
- Refer to the scanner’s user manual or online resources to interpret the trouble codes.
- Take necessary action to address the specific issue indicated by the trouble codes.
Understanding the Check Engine Light Scanner
If you own a vehicle, you are probably familiar with the frustration of seeing the check engine light (CEL) illuminate on your dashboard. This small but significant light serves as an indicator that there may be an issue with your vehicle’s engine or other important components. To help diagnose the problem, you can use a check engine light scanner. In this article, we will explore how to effectively use a check engine light scanner, enabling you to understand and resolve potential issues with your vehicle.
Step 1: Identify the Diagnostic Port
The first step in using a check engine light scanner is to locate the diagnostic port in your vehicle. Each vehicle manufacturer may place the diagnostic port in a different location, but it is commonly found under the dashboard on the driver’s side. In some cases, you may need to refer to the vehicle’s manual to find the exact location. Once you have identified the diagnostic port, make sure your vehicle is turned off before proceeding.
It’s important to note that newer vehicles may have an OBD-II or OBD2 port, which is a standard diagnostic port found in most vehicles manufactured after 1996. Older vehicles may have different types of ports, such as OBD-I or proprietary ports specific to the manufacturer. Ensure that the check engine light scanner you choose is compatible with the type of diagnostic port in your vehicle.
When you have located the diagnostic port, connect the check engine light scanner to it. The connection should be secure and snug. The scanner may have a cable that plugs directly into the port or a wireless connection, depending on the scanner model. Double-check that the scanner is properly connected before moving on to the next step.
Step 2: Turn on the Ignition
Once the check engine light scanner is securely connected to the diagnostic port, it’s time to turn on the ignition. The ignition should be in the “ON” position, but avoid starting the engine. This will power up the scanner and allow it to communicate with your vehicle’s onboard computer system.
Some check engine light scanners may require you to enter specific vehicle information, such as the make, model, and year, before proceeding. Follow any prompts or instructions provided by the scanner to ensure accurate diagnostics.
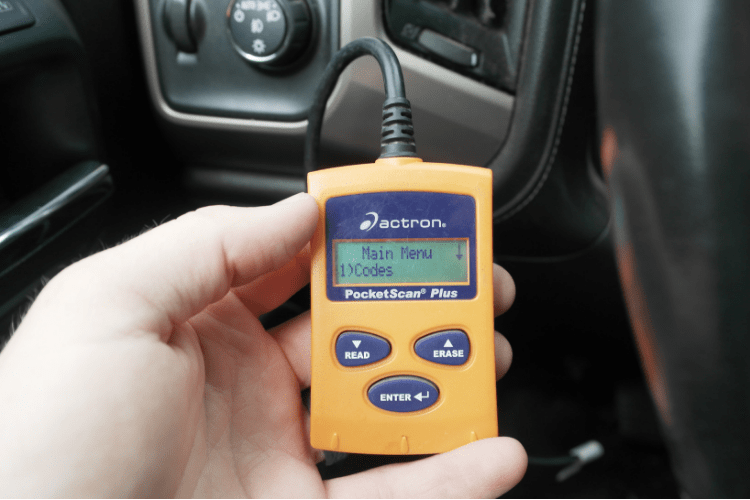
At this point, you may see the check engine light scanner’s screen light up and display options or menus. Use the scanner’s navigation buttons or touchscreen, if applicable, to access the “Read Codes” or “Scan” function. This function will initiate a diagnostic scan of your vehicle’s onboard computer and retrieve any stored trouble codes.
Step 3: Retrieve the Trouble Codes
Once the scan is initiated, the check engine light scanner will communicate with your vehicle’s onboard computer system and retrieve any trouble codes that have been stored. These trouble codes are specific to the issue that triggered the check engine light. Each code corresponds to a particular problem or component in your vehicle.
The check engine light scanner will display these trouble codes on its screen. Depending on the scanner model, the codes may be presented as a series of numbers, letters, or a combination of both. It may also provide a brief description of the code or its potential cause. Make note of these trouble codes, as they will be essential for further diagnosis and troubleshooting.
Some check engine light scanners may offer additional features, such as the ability to clear trouble codes or view live data from your vehicle’s sensors. These features can provide more in-depth information and aid in the diagnostic process. Familiarize yourself with the scanner’s functions and explore any additional capabilities it may offer.
Step 4: Interpret and Address the Trouble Codes
After retrieving the trouble codes, the next step is to interpret and address them. Each trouble code corresponds to a specific problem, whether it is a malfunctioning sensor, an emission issue, or a mechanical problem. In some cases, the trouble codes may lead to a straightforward diagnosis. However, in other instances, further investigation may be required to identify and resolve the underlying issue.
One option is to search for the trouble code online using reliable sources such as manufacturer databases or reputable automotive websites. These sources often provide information about common causes and potential solutions for each trouble code. However, keep in mind that trouble codes are not always definitive and may require professional expertise to accurately diagnose and repair.
If you are comfortable and have the necessary tools and skills, you may attempt to address the issue yourself. This could involve replacing a faulty sensor, tightening loose connections, or resolving an electrical problem. However, it’s crucial to exercise caution and only proceed if you have the knowledge and confidence to do so.
Conclusion
Using a check engine light scanner is an invaluable tool for diagnosing potential issues with your vehicle. By following the steps outlined above, you can confidently connect the scanner, retrieve and interpret trouble codes, and take appropriate action to address the problem. Remember, if you encounter any difficulties or are unsure about the diagnosis, it is always wise to consult a professional mechanic who can provide expert guidance and assistance.
How to Use a Check Engine Light Scanner?
A check engine light scanner is a diagnostic tool used to identify issues with a vehicle’s engine. It is essential for professional mechanics and car owners who want to troubleshoot and fix engine problems efficiently. Here’s a guide on how to use a check engine light scanner:
1. Prepare the scanner: Ensure that the vehicle’s ignition is turned off. Locate the diagnostic port, typically found below the steering wheel.
2. Connect the scanner: Plug the scanner’s connector into the diagnostic port. Make sure it fits securely.
3. Turn on the ignition: Switch the vehicle’s ignition to the “On” position without starting the engine.
4. Start the scan: Follow the scanner’s instructions to initiate a scan. Wait for the scanner to communicate and retrieve the error codes.
5. Read the codes: Once the scan is complete, the scanner will display the error codes. Take note of the codes as they will provide information about the specific issues.
6. Interpret the codes: Refer to the scanner’s manual or search online for the meaning of the error codes. This will help determine the necessary repairs or actions.
7. Clear the codes: If necessary, clear the error codes using the scanner. However, ensure that the underlying issue is resolved before clearing the codes.
Key Takeaways: How to Use a Check Engine Light Scanner?
- Connect the scanner to the OBD-II port of your vehicle.
- Turn on the ignition without starting the engine.
- Follow the instructions on the scanner’s display or app.
- Scan for trouble codes and diagnose the issue.
- Take necessary steps to fix the problem or consult a professional mechanic.
Frequently Asked Questions
Using a check engine light scanner can help you diagnose and troubleshoot issues with your vehicle. Here are some frequently asked questions about using a check engine light scanner:
1. How do I connect the check engine light scanner to my vehicle?
To connect the check engine light scanner to your vehicle, locate the OBD-II port. This port is usually found under the dashboard on the driver’s side. Insert the scanner’s connector into the port until it clicks into place. Make sure the ignition is turned off before connecting the scanner.
Once the scanner is connected, you can turn on the ignition to power the scanner. Some scanners may also require you to start the engine for certain functions. Refer to the scanner’s user manual for specific instructions on how to connect and power it.
2. How do I retrieve the diagnostic trouble codes (DTCs) from the scanner?
After connecting the scanner to the vehicle, you can retrieve the diagnostic trouble codes (DTCs) by following these steps:
1. With the ignition on, navigate the scanner’s menu to the “Read Codes” or “Retrieve Codes” option.
2. Select the option to read the codes, and wait for the scanner to communicate with the vehicle’s onboard computer.
3. Once the communication is established, the scanner will display the DTCs associated with the check engine light. Write down the codes for further analysis or use the scanner’s built-in code explanation function to interpret the codes.
3. Can I clear the check engine light using the scanner?
Yes, most check engine light scanners allow you to clear the check engine light after resolving the issue. Here’s how you can clear the check engine light using the scanner:
1. With the ignition on, navigate the scanner’s menu to the “Erase Codes” or “Clear Codes” option.
2. Select the option to clear the codes, and wait for the scanner to communicate with the vehicle’s onboard computer.
3. Once the codes are cleared, the check engine light should turn off. It may take a few driving cycles for the light to stay off permanently. Note that clearing the codes will also erase valuable diagnostic information, so make sure the issue is resolved before clearing the codes.
4. How often should I use the check engine light scanner?
It is a good practice to use the check engine light scanner whenever the check engine light illuminates. This will help you identify the cause of the issue and determine if it requires immediate attention or if it can be resolved later. Additionally, you can use the scanner for regular maintenance checks to ensure your vehicle is in optimal condition.
If you notice any unusual symptoms or changes in your vehicle’s performance, it is recommended to use the scanner to diagnose the problem promptly.
5. Are there any precautions I should take when using a check engine light scanner?
While using a check engine light scanner, it is important to keep the following precautions in mind:
1. Always refer to the scanner’s user manual for specific instructions and guidelines.
2. Make sure the ignition is turned off before connecting or disconnecting the scanner.
3. Do not disconnect the scanner while it is communicating with the vehicle’s onboard computer.
4. Use caution when interpreting diagnostic trouble codes (DTCs) and seek professional help if needed.
5. Clearing the check engine light codes does not fix the underlying problem. Ensure the issue is resolved before clearing the codes.
How To Use An OBD2 Code Reader To Diagnose Check Engine Light Issues
In conclusion, using a check engine light scanner is a simple process that can help you identify potential issues with your vehicle. By following a few easy steps, you can use the scanner to access the diagnostic trouble codes (DTCs) stored in your vehicle’s onboard computer. These codes will provide you with valuable information about the specific problem causing the check engine light to illuminate.
To use a check engine light scanner, start by locating the diagnostic port in your vehicle, usually located under the dashboard. Connect the scanner to the port and turn on the ignition. Then, follow the instructions provided by the scanner to retrieve the DTCs. Once you have the codes, you can refer to the scanner’s manual or search online for their meanings. This will help you understand the issue and determine the necessary action to take, whether it’s a simple fix or a visit to a mechanic.
Home - How To Use A Check Engine Light Scanner?