Transfer Case Output Shaft Seal Leak: Detecting And Repairing Transfer Case Output Shaft Seal Leak
Transfer case output shaft seal leaks can cause significant damage to your vehicle and lead to costly repairs. It is important to detect and repair these leaks as soon as possible to prevent further complications. Did you know that a small leak in the seal can result in a loss of lubrication, leading to excessive wear and tear on the transfer case components?
The transfer case output shaft seal is responsible for keeping the fluid inside the transfer case and preventing it from leaking out. Over time, the seal can wear down or become damaged, causing leaks to occur. This can result in a loss of fluid, which can cause the transfer case to overheat and fail. Detecting a transfer case output shaft seal leak can be done by inspecting the area around the seal for any signs of fluid leakage. If a leak is detected, it is crucial to repair the seal as soon as possible to avoid further damage to the transfer case. By replacing the damaged seal, you can prevent future leaks and ensure the proper functioning of your transfer case.
If you suspect a transfer case output shaft seal leak, it’s important to detect and repair it promptly to prevent further damage. Start by inspecting the transfer case for any signs of leaking fluid. If you notice fluid dripping from the seal, it’s a clear indication of a leak. To repair the seal, remove the driveshaft and old seal, clean the area thoroughly, and install a new seal using a seal driver tool. Finally, reassemble the driveshaft and refill the transfer case with the appropriate fluid.
Understanding Transfer Case Output Shaft Seal Leak
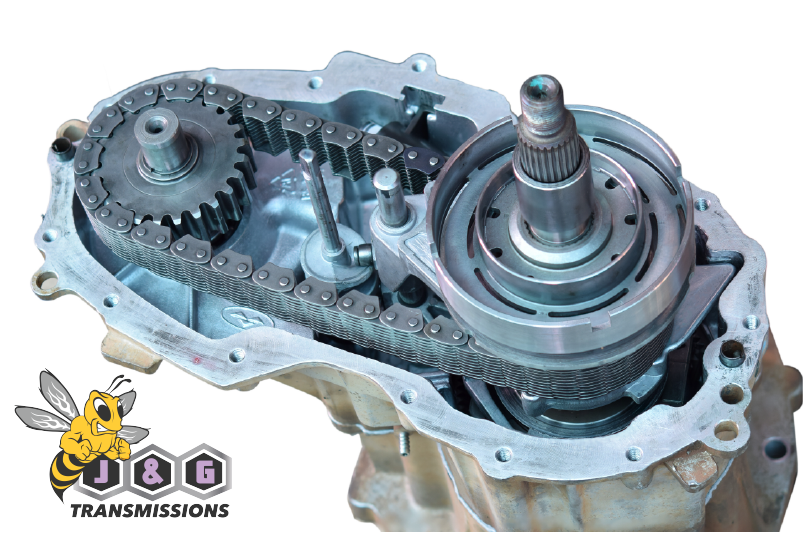
A transfer case is a crucial component in a four-wheel drive or all-wheel drive vehicle. It transfers power from the transmission to the front and rear axles, allowing the vehicle to distribute torque and handle various terrains effectively. One critical part of the transfer case is the output shaft seal, which prevents fluid from leaking out and contaminants from entering the case. However, over time, the output shaft seal can develop leaks, causing fluid loss and potential damage to the transfer case. In this article, we will explore the detection and repair of transfer case output shaft seal leaks.
Detecting Transfer Case Output Shaft Seal Leak
Identifying a transfer case output shaft seal leak can be challenging, as the leak might not be easily visible. However, there are a few signs that can indicate a potential leak:
- Visible fluid drips or puddles under the vehicle
- Low transfer case fluid levels
- Burning smell from the transfer case
- Noise or vibration from the transfer case
If you notice any of these signs, it is essential to inspect the transfer case output shaft seal for leaks and address the issue promptly to prevent further damage.
Inspecting the Transfer Case Output Shaft Seal
To inspect the transfer case output shaft seal, follow these steps:
- Locate the transfer case, usually located between the transmission and the rear differential.
- Clean the area around the transfer case output shaft seal to remove any dirt or debris.
- Visually inspect the seal for any signs of fluid leakage, such as wetness or stains.
- If necessary, use a flashlight and mirror to get a better view of the seal.
If the seal appears damaged or if there are noticeable leaks, it is advisable to replace the transfer case output shaft seal to prevent further complications.
Replacing the Transfer Case Output Shaft Seal
Replacing the transfer case output shaft seal requires some mechanical skills and the right tools. Here are the general steps involved:
- Drain the transfer case fluid using the appropriate method recommended by the vehicle manufacturer.
- Remove any components blocking access to the transfer case output shaft seal, such as the driveshaft or crossmember.
- Use a seal removal tool or a suitable alternative to carefully remove the old seal without damaging the transfer case.
- Clean the area and apply a thin layer of transmission fluid to the new seal before installing it.
- Gently press the new seal into place, ensuring it sits flush with the transfer case surface.
- Reassemble any components that were removed and refill the transfer case with the appropriate fluid according to the manufacturer’s specifications.
- Start the vehicle and check for any leaks. If no leaks are present, the transfer case output shaft seal replacement is successful.
Preventing Transfer Case Output Shaft Seal Leak
While it is impossible to completely prevent a transfer case output shaft seal leak, there are some measures you can take to reduce the risk:
- Maintain the proper fluid level in the transfer case and regularly check for any leaks.
- Avoid excessive off-road driving or harsh driving conditions that can put extra strain on the transfer case and its components.
- Inspect the transfer case output shaft seal during regular vehicle maintenance and address any issues promptly.
- Follow the manufacturer’s recommended service intervals for the transfer case fluid change.
Repairing Transfer Case Output Shaft Seal Leak
In conclusion, detecting and repairing a transfer case output shaft seal leak is crucial for maintaining the proper function of the transfer case in a four-wheel drive or all-wheel drive vehicle. By being attentive to the signs of a leak, inspecting the seal regularly, and taking prompt action when necessary, you can prevent further damage and ensure the longevity of your vehicle’s transfer case.
Transfer Case Output Shaft Seal Leak: Detecting and Repairing Transfer Case Output Shaft Seal Leak
A transfer case output shaft seal leak can cause transmission fluid to leak from the transfer case, leading to potential damage and costly repairs. Detecting and repairing this leak is crucial for maintaining the performance and longevity of your vehicle.
Here are some steps to help you detect and repair a transfer case output shaft seal leak:
- Inspect for signs of a leak: Look for red fluid stains underneath your vehicle or on the transfer case.
- Check the fluid level: If the fluid level is consistently low, it may indicate a leak.
- Replace the seal: If the seal is damaged or worn, it should be replaced with a new one.
- Clean the mating surfaces: Before installing the new seal, make sure to clean the mating surfaces to ensure a proper seal.
- Reinstall the shaft: Carefully reinstall the output shaft, making sure it is properly aligned.
- Test for leaks: Once the seal is replaced, test for leaks by running the vehicle and checking for any fluid drips or stains.
If you are unsure about detecting or repairing a transfer case output shaft seal leak, it is recommended to consult a professional mechanic or technician who specializes in transmission repairs. They have the expertise and tools to accurately diagnose and fix the issue, ensuring your vehicle is safe and reliable on the road.
Key Takeaways:
- Inspect the transfer case output shaft seal for signs of leakage.
- Look for oil stains or puddles under the vehicle.
- Check the transfer case fluid level regularly to identify potential leaks.
- Replace the transfer case output shaft seal if it is damaged or leaking.
- Properly clean and install the new seal to ensure a tight seal.
Frequently Asked Questions
Here are some commonly asked questions about detecting and repairing transfer case output shaft seal leaks.
1. What are the signs of a transfer case output shaft seal leak?
If you have a transfer case output shaft seal leak, you may notice the following signs:
– Oil spots or puddles under your vehicle
– A burning smell, especially coming from the transfer case area
– Difficulty or hesitation when shifting gears
If you experience any of these symptoms, it’s crucial to have your transfer case inspected and the seal replaced if necessary.
2. How is a transfer case output shaft seal leak detected?
To detect a transfer case output shaft seal leak, a professional technician will:
– Inspect the transfer case for oil residue or leaks
– Perform a visual inspection of the seal and surrounding components
– Test drive the vehicle to observe any abnormal behavior or performance issues related to the seal leak
3. Can I repair a transfer case output shaft seal leak on my own?
While it’s possible to repair a transfer case output shaft seal leak on your own, it is recommended to seek professional assistance. This is a complex and critical component of your vehicle, and improper installation or repair can lead to further damage or leaks. It’s best to trust the expertise of a qualified technician to ensure the job is done correctly.
4. How much does it cost to repair a transfer case output shaft seal leak?
The cost to repair a transfer case output shaft seal leak can vary depending on the make and model of your vehicle, as well as the labor rates of the repair shop. On average, the cost can range from $200 to $500, including parts and labor. It’s always a good idea to get multiple quotes from reputable repair shops to ensure you’re getting a fair price.
5. How long does it take to repair a transfer case output shaft seal leak?
The time it takes to repair a transfer case output shaft seal leak can vary depending on the extent of the leak and the accessibility of the seal. Generally, it can take anywhere from 2 to 4 hours to complete the repair. However, additional time may be required if there are other issues discovered during the inspection. Your repair technician will be able to provide a more accurate estimate once they assess the situation.
How to Replace Rear Output Drive Shaft Seal in Transfer Case
To detect and repair a transfer case output shaft seal leak, it is important to first identify the signs of a leak. Look for fluid dripping from the transfer case, puddles of fluid underneath the vehicle, or a low level of transmission fluid. Once the leak is confirmed, the repair process can begin.
Repairing the transfer case output shaft seal leak requires removing the drive shaft and the old seal. It is important to clean the area thoroughly and inspect for any damage before installing the new seal. Carefully install the new seal, ensuring it is properly seated and aligned, and reassemble the components. Finally, refill the transfer case with the appropriate fluid and test for any leaks.
Home - Transfer Case Output Shaft Seal Leak: Detecting And Repairing Transfer Case Output Shaft Seal Leak